If you’ve ever bitten into a dessert so light, so crisp on the outside yet delightfully soft in the center—it was probably a pavlova cookie. These elegant little sweets, inspired by the classic pavlova dessert, are a heavenly mix of airy meringue and melt-in-your-mouth texture. But what exactly makes a pavlova cookie different from a regular meringue? Where did it come from? And how can you make these impressive treats at home—even if you’re not a pro baker?
In this in-depth guide, we’ll break down everything you need to know about pavlova cookies: from their origins and ingredients to step-by-step baking techniques, serving ideas, fun facts, and expert tips. You’ll even learn how pavlova differs from meringue, and why this dessert has become a favorite at parties, brunches, and even weddings.
Don’t miss our Candy Apple Cookie Recipe if you’re craving more sweet inspiration.
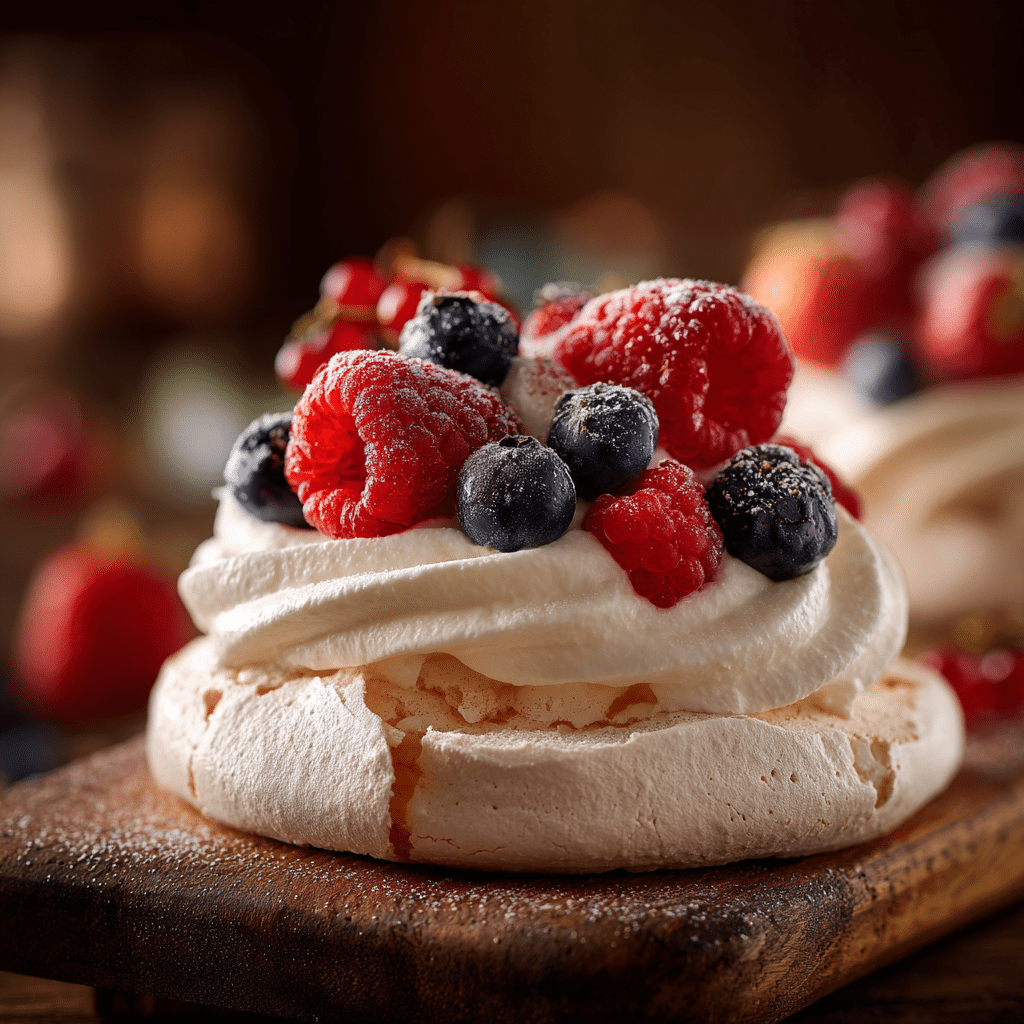
Let’s get into the magic of pavlova cookies.
Pavlova Cookie – The Ultimate Guide to This Cloud-Like Dessert
- Total Time: 1 hour 15 minutes
- Yield: 12 cookies 1x
Description
Pavlova cookies are light, airy meringue-style cookies with a crisp exterior and a soft, marshmallow-like center. Inspired by the classic pavlova dessert, these elegant treats are naturally gluten free and perfect for topping with whipped cream and fresh fruit.
Ingredients
4 large egg whites, room temperature
1 cup superfine sugar (caster sugar)
1 tbsp cornstarch
1 tsp white vinegar or lemon juice
1 tsp vanilla extract
Pinch of salt
Whipped cream, for topping
Fresh fruit such as berries, kiwi, or passionfruit, for topping
Instructions
1. Preheat oven to 250°F (120°C) and line a baking sheet with parchment paper.
2. In a clean, dry bowl, beat the egg whites and salt on medium speed until soft peaks form.
3. Gradually add the sugar, one tablespoon at a time, beating until the mixture is glossy and stiff peaks form.
4. Gently fold in the cornstarch, vinegar or lemon juice, and vanilla extract without deflating the mixture.
5. Spoon or pipe small mounds of the meringue onto the prepared baking sheet.
6. Bake for 50 to 60 minutes until the outsides feel dry but remain pale.
7. Turn off the oven and let the cookies cool inside with the door slightly open for 30 minutes.
8. Once fully cooled, top with whipped cream and fresh fruit just before serving.
Notes
Pavlova cookies are best enjoyed the day they are made. Store plain cookies in an airtight container at room temperature and add toppings just before serving.
- Prep Time: 15 minutes
- Cook Time: 60 minutes
- Category: Dessert
- Method: Baking
- Cuisine: Australian
Nutrition
- Serving Size: 1 cookie
- Calories: 95
- Sugar: 13 g
- Sodium: 12 mg
- Fat: 0.2 g
- Saturated Fat: 0 g
- Unsaturated Fat: 0.2 g
- Trans Fat: 0 g
- Carbohydrates: 14 g
- Fiber: 0 g
- Protein: 1.5 g
- Cholesterol: 0 mg
What is a Pavlova Cookie?
Understanding the Pavlova Cookie Phenomenon
A pavlova cookie is a smaller, individual version of the traditional pavlova cake—an Australian and New Zealand dessert created to honor the Russian ballerina Anna Pavlova in the 1920s. While the original pavlova is a large, circular meringue shell topped with whipped cream and fruit, pavlova cookies shrink that elegance into bite-sized pieces.
They offer the same crispy outer shell and marshmallow-soft center, making them an ideal treat for those who love a balance of textures. These cookies are usually topped with fresh fruit like berries or kiwi, sometimes a dollop of cream, or even a drizzle of chocolate for modern twists.
Unlike typical cookies made with flour and butter, pavlova cookies rely on egg whites and sugar as their primary ingredients. That makes them naturally gluten-free and surprisingly simple to make—yet still impressive enough to serve at fancy gatherings.
Origins and History of Pavlova in Cookie Form
The pavlova dessert has been a subject of international food rivalry, with both Australia and New Zealand claiming its invention. Named after the graceful Russian dancer who toured both countries in the 1920s, the pavlova reflects her airy, delicate style—a tribute in both flavor and form.
Over time, bakers sought more accessible versions of this elegant treat. Enter: the pavlova cookie. It took off as a practical, portion-controlled alternative to the full-sized pavlova. These cookies retained the same light texture and rich visual appeal, but with less commitment—and less mess.
By the early 2000s, pavlova cookies started gaining attention in food blogs and bakery menus across the United States, thanks to the growing popularity of gluten-free desserts and elegant, Instagram-worthy sweets.
Pavlova Cookie vs. Meringue Cookie – What’s the Difference?
Texture, Technique, and Taste: The Key Differences
Let’s settle the debate: is a pavlova cookie just a fancier meringue? Not quite.
At first glance, both pavlova cookies and meringue cookies look alike—they’re both white, crisp, and made from whipped egg whites and sugar. But when you bite in, the difference is clear. Meringue cookies are dry and crunchy all the way through, while pavlova cookies have a crisp exterior with a soft, marshmallowy center that practically melts in your mouth.
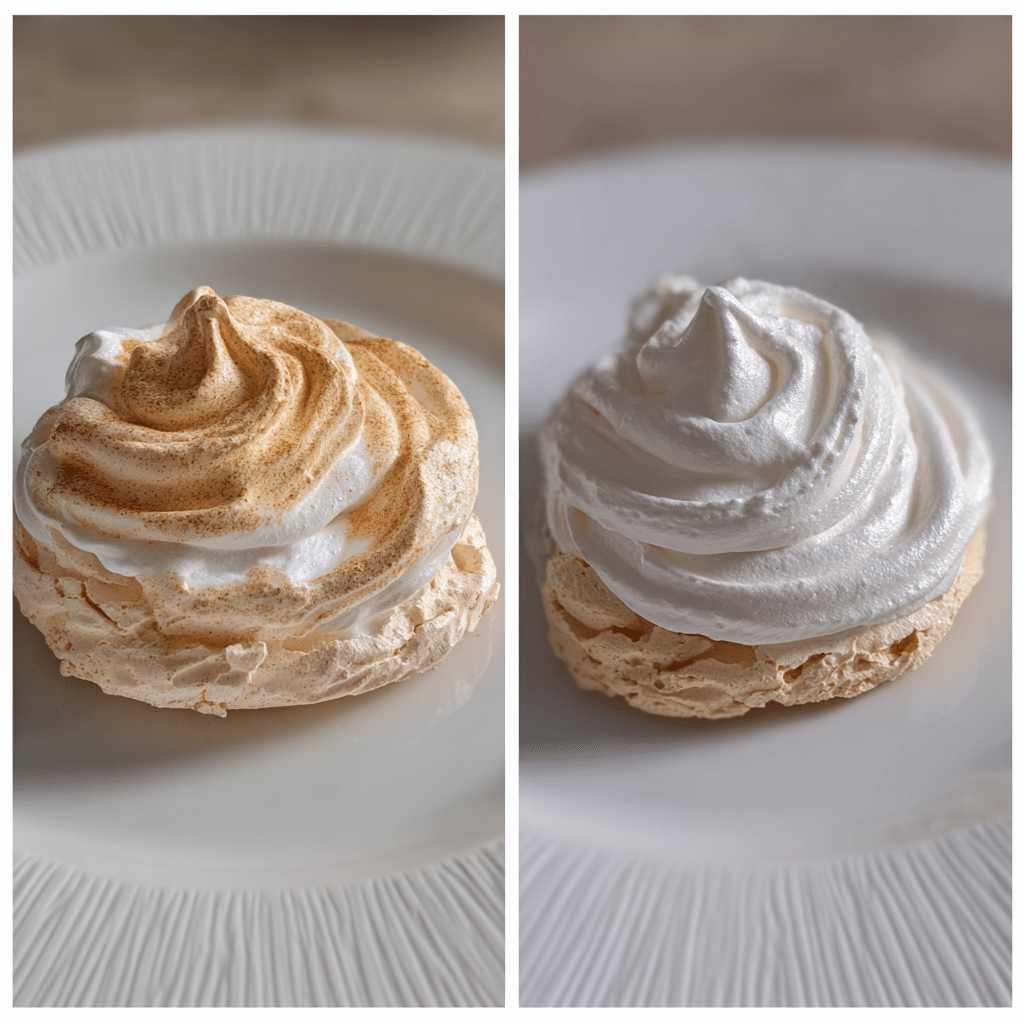
What really separates pavlova cookies from traditional meringue cookies is how they’re built and baked. Pavlova cookies typically use a mix that includes stabilizers like a touch of vinegar or lemon juice and a spoonful of cornstarch. These ingredients help lock in moisture during baking, giving the cookies a signature soft, almost marshmallow-like center beneath their crisp surface.
On the flip side, meringue cookies are baked using a long, slow drying process at low heat. This removes most of the internal moisture, leaving them crisp all the way through. While this method creates a longer-lasting cookie, it lacks the creamy texture contrast that makes pavlova cookies so memorable.
| Feature | Pavlova Cookie | Meringue Cookie |
|---|---|---|
| Texture | Crisp outside, soft & chewy inside | Dry and crunchy throughout |
| Ingredients | Egg whites, sugar, cornstarch, vinegar | Egg whites, sugar |
| Baking Temperature | Moderate heat for a short time | Low heat for a long duration |
| Shelf Life | Best eaten fresh | Long-lasting |
| Flavor Profile | Lightly sweet, slightly creamy | Airy, pure sugar taste |
Common Misconceptions Between Pavlova and Meringue Cookies
One of the biggest misconceptions is that pavlova and meringue cookies are interchangeable. They’re not.
Another myth? That pavlova cookies are harder to make. Truth is, pavlova cookies are very forgiving, especially when you follow a good recipe. Even if they crack or sink slightly, they’re still beautiful and delicious—often topped with whipped cream or fruit to mask any imperfections.
So the next time you’re deciding between the two, ask yourself: Do I want a crunchy bite or a cloud-like, chewy center? If it’s the latter, pavlova cookies are your answer.
Key Ingredients That Make a Pavlova Cookie Stand Out
Egg Whites and Sugar – The Science of Stability
The foundation of every pavlova cookie is perfectly whipped egg whites. This is where texture magic happens. Egg whites are beaten until stiff peaks form, and sugar is slowly added to stabilize the structure.
But pavlova cookies aren’t just about egg whites and sugar. The secret lies in the supporting players:
- Cornstarch: Helps keep the interior chewy and tender rather than crisping up completely like a meringue.
- White Vinegar or Lemon Juice: Balances the sweetness and adds acidity to stabilize the foam.
- Vanilla Extract: Optional, but gives a warm undertone that enhances the final flavor.
The slow incorporation of sugar (usually superfine or caster sugar) helps dissolve it completely, avoiding gritty textures. Patience pays off here—the smoother the mix, the silkier the result.
Toppings: Whipped Cream, Fruits, and More
Unlike traditional cookies, pavlova cookies are meant to be dressed up. Their blank-canvas base pairs beautifully with a variety of toppings, which is where you can get creative:
- Whipped Cream: The classic go-to. Soft, pillowy, and light enough to not overpower the base.
- Fresh Fruit: Berries, kiwi, mango, passionfruit, and figs are popular choices for their acidity and visual pop.
- Chocolate Drizzle: A light pour of dark or white chocolate adds richness.
- Edible Flowers or Mint Leaves: For presentation and subtle aroma.
These toppings not only add visual flair, but also create a flavor contrast—sweet meringue, tangy fruit, creamy whip—all working together to deliver a balanced bite.
Check out Rosemary’s Bakery Whipped Cream Cake for more whipped-cream topping inspiration.
How to Make Pavlova Cookies – Step-by-Step Instructions
Equipment and Ingredient Checklist
Making pavlova cookies might sound intimidating, but the process is actually quite beginner-friendly. You don’t need professional tools—just a few kitchen basics and attention to technique.
Essential Equipment:
- Electric hand mixer or stand mixer with whisk attachment
- Mixing bowls (preferably glass or metal)
- Baking sheet
- Parchment paper or silicone baking mat
- Spatula
- Measuring cups and spoons
- Cooling rack
Core Ingredients:
- 4 large egg whites (room temperature)
- 1 cup superfine sugar (caster sugar recommended)
- 1 tsp white vinegar or lemon juice
- 1 tbsp cornstarch
- 1 tsp pure vanilla extract
- Optional: pinch of salt
Topping Ideas (Optional but Highly Recommended):
- Fresh berries (raspberries, strawberries, blueberries)
- Whipped cream
- Chocolate shavings or drizzle
- Passionfruit pulp
- Edible flowers or crushed pistachios
Baking Instructions for the Perfect Crunch and Chew
Here’s your go-to guide for whipping up flawless pavlova cookies from scratch:
Step 1: Preheat and Prep
Preheat your oven to 250°F (120°C). Line your baking sheet with parchment paper or a silicone mat.
Step 2: Whip the Egg Whites
Start by whipping the egg whites in a clean, grease-free bowl on medium speed. Once they reach soft peaks, slowly add the sugar, one tablespoon at a time, while still mixing.
Step 3: Add Flavor and Structure
Once the mixture turns glossy and forms stiff peaks, gently fold in the vanilla extract, cornstarch, and vinegar. Be careful not to deflate the mixture.
Step 4: Shape the Cookies
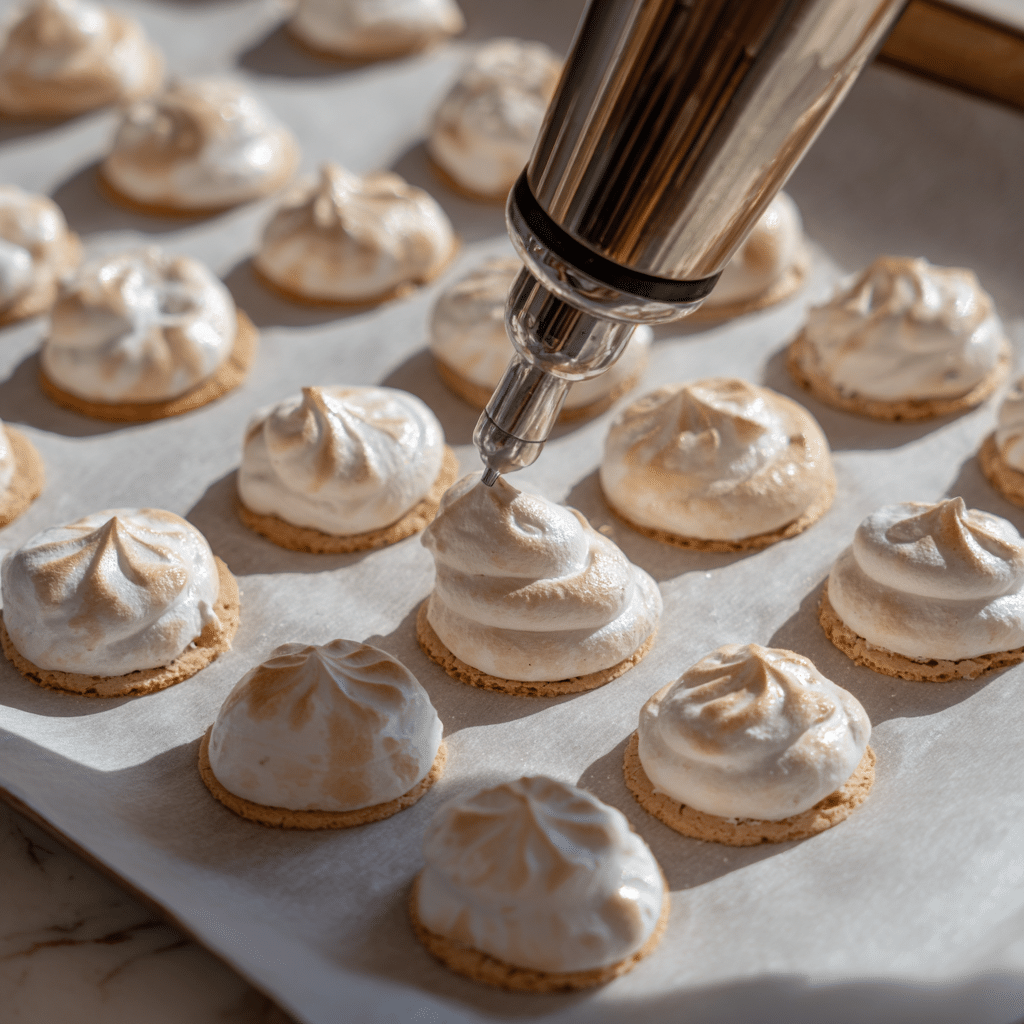
Spoon or pipe small portions of the meringue onto the prepared baking tray, spacing them evenly.
Step 5: Bake Low and Slow
Bake for 50–60 minutes. The surface should feel dry but remain pale without browning. Turn off the oven and let the cookies cool inside with the door slightly open for 30 minutes.
Step 6: Decorate and Serve
After the cookies have fully cooled, add a dollop of whipped cream to each one and finish with your favorite fresh fruit on top.
Discover great ideas like Shoestring Potato Fries Guide to pair savory bites with these sweet treats!
Pavlova Cookie Recipe Variations You’ll Love
Mini Pavlova Cookies for Parties
Hosting a party or afternoon tea? Mini pavlova cookies are a charming, mess-free option that guests love. Make them bite-sized—about 2 inches wide—and serve them on a decorative platter topped with whipped cream, berries, and a drizzle of honey.
You can even color the meringue with natural food powders like matcha or freeze-dried raspberry for a pop of color without artificial dyes.
Want to turn your pavlova cookie platter into a talking point? Arrange them in rainbow layers by using assorted fruit toppings in a gradient—strawberries, oranges, kiwi, blueberries, and blackberries.
Chocolate Drizzle and Berry Bliss Combos
There’s no rule saying pavlova has to stick to tradition. Add your own twist by infusing flavors directly into the base or through toppings.
Flavor Pairing Ideas:
- Dark Chocolate + Raspberry: Rich, tart, and indulgent.
- Lemon Curd + Blueberry: Bright and citrusy with juicy bursts.
- Salted Caramel + Banana: A fusion of creamy and sweet-salty goodness.
You can also fold crushed freeze-dried strawberries or cocoa powder into the meringue before baking for flavor baked right into the cookie.
Feeling inspired? Check out our Main Dishes Section to see how we pair desserts with full-course meals for a complete experience.
Expert Tips for Foolproof Pavlova Cookies
Avoiding Common Mistakes (Humidity, Overbeating, etc.)
Even though pavlova cookies are relatively simple, there are a few critical points where things can go wrong. Here’s how to avoid the most common baking mishaps:
- Watch the Weather: Meringue-based desserts like pavlova cookies don’t like humidity. Moisture in the air can prevent the exterior from drying properly, leaving your cookies sticky instead of crisp. Try baking on a dry day or use a dehumidifier in the kitchen.
- No Yolk Allowed: Even a small trace of egg yolk in your whites can ruin the meringue. Crack eggs carefully and always start with a clean, dry bowl.
- Don’t Rush the Sugar: Adding sugar too quickly before the egg whites reach soft peaks can result in a flat, grainy mix. Add it gradually and give it time to dissolve completely.
- Skip the Shortcuts: Preheating your oven and allowing the cookies to cool slowly inside the turned-off oven are essential steps. Taking them out too soon can lead to cracking or collapse.
- Keep Mixing to a Minimum After Peaks: Once stiff peaks form, don’t overbeat. Over-mixing breaks down the air bubbles you’ve worked hard to incorporate, which affects the cookie’s lift and texture.
Storage and Make-Ahead Tips
Pavlova cookies are best when freshly topped, but here’s how to get ahead of the game:
- Make the Cookies in Advance: You can bake the pavlova cookie bases up to 2 days ahead. Just store them in an airtight container at room temperature. Avoid the fridge—it adds moisture and will ruin the texture.
- Add Toppings Just Before Serving: Whipped cream and fruit should only be added right before eating. If left on too long, they’ll soften the crisp shell.
- Re-Crisp If Needed: If your cookies go soft from humidity, pop them in a low oven (around 200°F) for 10 minutes to refresh the outer crispiness—just be sure not to burn them.
Looking for inspiration? Try our Candy Apple Cookie Recipe for another delightful seasonal treat.
Serving and Pairing Pavlova Cookies Like a Pro
Best Beverages to Pair With Pavlova Cookies
A pavlova cookie isn’t just a dessert—it’s an experience. Elevate that experience with the right drink pairings:
- Sparkling Wine or Champagne: The crisp bubbles cut through the sweetness and cleanse the palate.
- Iced Herbal Teas: Flavors like hibiscus, mint, or chamomile provide a refreshing, fruity balance.
- Coffee and Espresso: Bold espresso or a lightly sweet latte pairs beautifully with the chewy, airy texture of pavlova.
- Lemonade or Citrus Spritzers: Add a tart, tangy contrast to counter the sweet, creamy topping.
These drinks balance out the sugar in the pavlova cookie and allow its textures and flavors to really shine.
Seasonal Fruit Pairings for Visual Appeal and Flavor
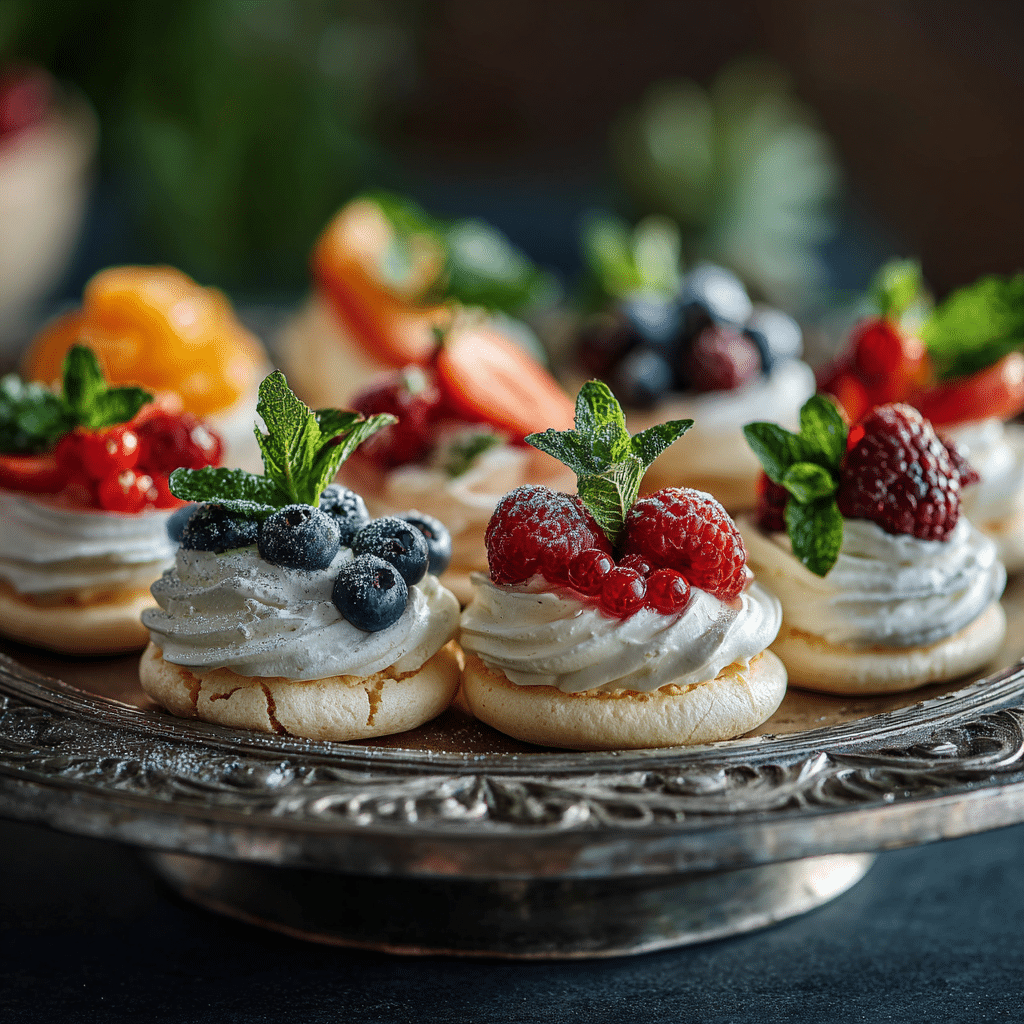
Fruit is more than just a topping—it’s what makes each pavlova cookie look as good as it tastes. Here are some winning combinations for each season:
| Season | Best Fruit Toppings |
|---|---|
| Spring | Strawberries, blueberries, rhubarb |
| Summer | Mango, kiwi, passionfruit, raspberries |
| Fall | Figs, pomegranate seeds, poached pears |
| Winter | Blood oranges, cranberries, sugared grapes |
Get creative by combining multiple fruits, adding zest or shaved chocolate, or finishing with fresh herbs like mint or basil. Not only does this enhance flavor—it adds eye-catching color and texture.
Check out Rosemary’s Bakery Whipped Cream Cake for more whipped topping pairings you can also use on pavlova cookies.
Fun Facts and Cultural Tidbits About Pavlova Cookies
Is Pavlova Cookie a Boy or a Girl? The Fun Behind the Name
This one gets people curious! The name “pavlova cookie” actually comes from the legendary Russian ballerina Anna Pavlova, who inspired the original dessert. So, while cookies don’t really have a gender, the name is definitely feminine—a tribute to grace, elegance, and lightness.
Some might jokingly ask, “Is pavlova a boy or girl?”—but the truth is, the name is all about honoring Anna’s legacy. Her graceful dance style is mirrored in the dessert’s light, airy texture, and the pavlova cookie brings that same elegance to a single, delicate bite.
Pavlova in Pop Culture and Modern Baking
Over the years, pavlova has made its way from formal dining tables to TV cooking competitions, Instagram feeds, and Pinterest boards. Its eye-catching appearance and customizable toppings make it a favorite among food stylists and dessert bloggers.
In recent years, pavlova cookies have taken on a life of their own:
- They’re wedding dessert table staples in Australia and New Zealand.
- Vegan pavlova cookies (made with aquafaba) are gaining popularity in plant-based baking communities.
- They’ve become a go-to for holiday desserts, thanks to their snowy appearance and bright fruit garnishes.
And while the origin of pavlova is a point of playful debate between New Zealand and Australia, there’s no doubt that the cookie-sized version has earned global appeal.
CONCLUSION: Wrapping Up the Pavlova Craze in Cookie Form
Whether you’re a new baker or a seasoned home cook, there’s something incredibly rewarding about crafting a dessert that looks impressive yet feels light as air. These mini pavlovas in cookie form offer that exact joy.
With a crisp outer layer and a melt-in-your-mouth center, this meringue-based dessert is endlessly customizable. Add your favorite fruits, a swirl of whipped cream, or a drizzle of caramel—it’s a sweet bite that always stands out. Perfect for parties, weekend treats, or elegant occasions, these chewy meringue bites are as versatile as they are beautiful.
Now that you’ve learned how to bake them, troubleshoot common mistakes, and personalize them with creative toppings, you’re more than ready to try this elevated twist on a classic sweet.
Looking for inspiration? Try our Candy Apple Cookie Recipe for another fruity favorite with a seasonal spin.
If this recipe sparked your appetite, you’ll love what I’m pinning on Pinterest and writing about on Medium.
FAQs
Let’s answer some of the most common questions about pavlova cookies—based on what people are asking online.
Pavlova cookies are crispy on the outside and soft, chewy inside, while meringue cookies are baked until completely dry and crunchy all the way through. The difference comes down to the use of cornstarch and vinegar in pavlova recipes, and the baking method that preserves moisture inside.
While cookies don’t have a gender, the name “Pavlova” is feminine, inspired by Anna Pavlova, a Russian ballerina. So culturally, the dessert carries a feminine association—but the cookie itself? It’s for everyone.
What makes a pavlova a pavlova?
It’s all about texture and structure. A pavlova has a crispy shell with a marshmallow-soft center, made possible by whipping egg whites with sugar, and stabilizing the mix with acid (vinegar or lemon juice) and cornstarch. It’s usually topped with cream and fresh fruit, giving it a refreshing finish.
What does a pavlova taste like?
A pavlova cookie is light, sweet, and slightly chewy. It tastes like a cloud of vanilla-flavored sugar, balanced by the tang of fruit and the richness of whipped cream. Each bite melts in your mouth, delivering a contrast of textures that’s hard to beat.

